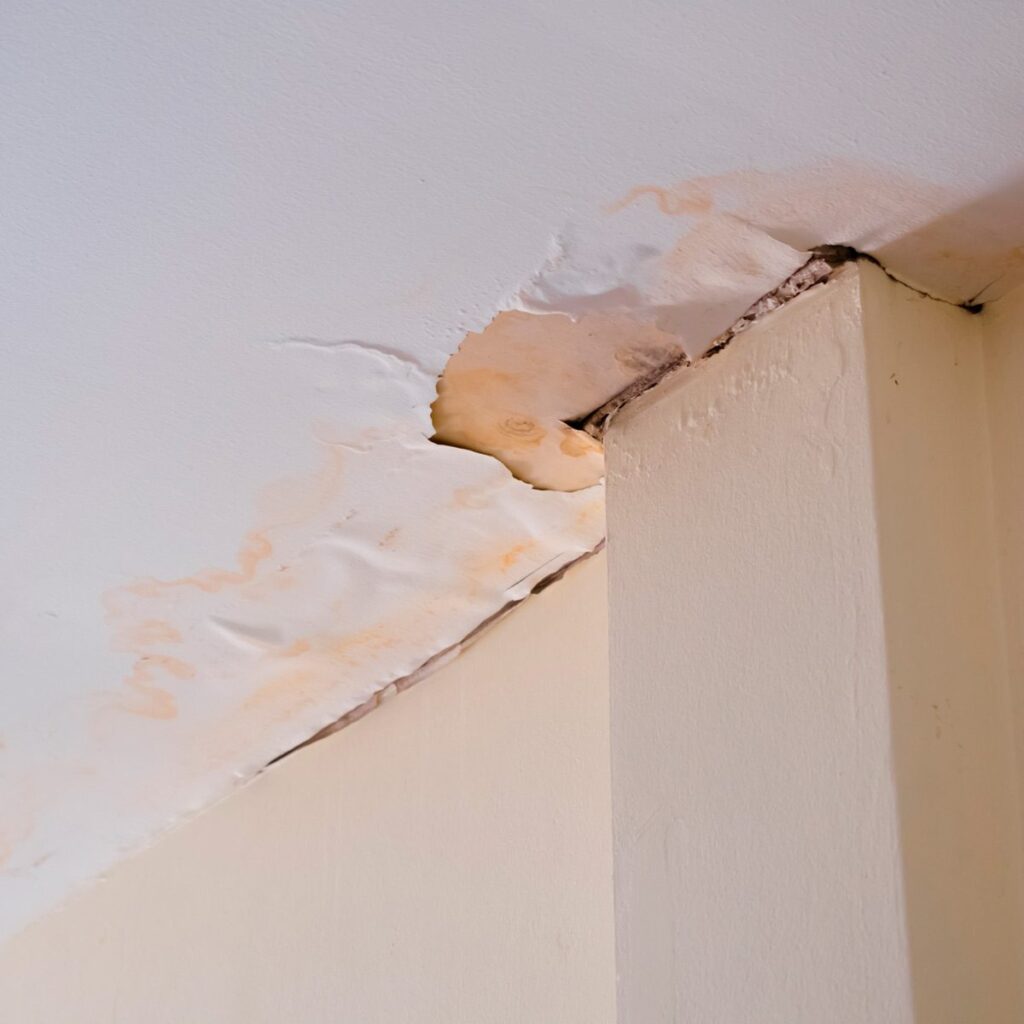
If your ceiling has sustained water damage, immediate action must be taken. Otherwise, serious issues like structural integrity issues, mold growth and health risks could arise.
First step to repairing water damage to a ceiling: locate its source. From there on out, the rest should go smoothly.
Find the Source
As soon as your ceiling begins leaking, it’s essential that you act swiftly to prevent water damage and structural issues. Even if your paint doesn’t peel and the drywall remains undamaged, a ceiling leak could still lead to mold growth and require costly repairs or removal altogether. Before making any decisions regarding replacement or repair efforts for damaged areas, however, first you must determine its source.
Locating the source can be challenging; oftentimes the leak comes from somewhere above. If you cannot pinpoint it on your own, professional plumbers will likely need to be brought in to trace down and fix the leakage.
Once the source has been addressed, you can move forward with repairing the ceiling itself. First step should be containing any leakage by placing buckets and containers on the floor to collect any dripping water; additionally, covering furniture may help prevent wet spots and ruin. Next, remove your belongings from affected rooms and set them outside for drying purposes.
After spraying the affected area with a bleach solution (1 part bleach to 2 parts water) to kill any mold growth, make sure it dries completely, and apply a stain blocker primer that can seal water stains while improving its appearance over time.
As this process can be time consuming and involves drying out multiple areas at once, it is best to entrust it to professionals if the damage is extensive. These specialists will not only mitigate water damage by drying out affected areas quickly and thoroughly but will also inspect surrounding areas to identify any additional issues that require attention. Ideally, professional restoration companies use industrial fans as well as mold prevention chemicals in order to make sure that damage doesn’t spread further throughout your home.
Remove the Damaged Drywall
Water damage may cause drywall to buckle or buckle up, and while it may be tempting to repair it by hammering, sometimes leaving the damage alone and patching with spackle and paint is better.
If you’re trying to determine the source of a leak, however, sometimes removing sections of ceiling may be necessary in order to pinpoint its exact location – though this can make pinpointing even harder! At least it gives a clearer view of what’s happening under there!
Once you’ve removed damaged drywall, it is vital that you carefully clean the area around it before moving any furniture away from its affected portion of ceiling and allow any water dripping down to reach the floor below. In order to minimize water damage further, lay down towels or place buckets near to collect any dripping water that might escape and drip down onto it.
Drywall can be an extremely challenging material to work with when it comes to repairing and replacing sections of ceiling damaged by damage. If this is your first experience with working with this material, hiring a handyman to complete repairs could save time – the amount of time a professional needs depends on the severity and extent of damage that needs repairing/replacing as well as replacement needs.
When installing or replacing drywall, it’s essential to follow proper installation techniques in order to achieve strong and secure repairs that resist moisture damage. In addition, using a leveler will help ensure all seams and corners are flat and even.
If your drywall has stains but little structural damage, using a keyhole saw to cut a rectangular or square shape that’s easy to replace with a patch can often save both money and effort as well as frustration. If the wall sags already, puncturing it to release water will help release pressure; be sure to place a bucket under this puncture so any further dripping water is caught by it before further puncturing occurs.

Dry the Damaged Area
If you find a water stain on your ceiling, it is vital that you act promptly. Water damaged ceilings can quickly develop mold and rot that could result in structural issues within your home as well as become an incubator for bacteria that cause health problems such as rashes, dizziness, headaches or asthma attacks.
Bob Vila suggests that water stains located near rooms containing plumbing – such as your bathroom or kitchen – could be due to leaky plumbing pipes; otherwise they could be the result of roof leakage or rainwater infiltration.
Once the source of leak has been discovered and eliminated, it’s time to dry out the damaged area. This may involve opening up ceiling panels, using a dehumidifier, or placing it near an exhaust fan; ultimately the aim should be to ensure as much drying as possible to minimize further damage in future.
When painting over damaged areas, be sure to use products specially formulated for ceilings – this will ensure that the paint adheres properly without peeling off. It may also be beneficial to invest in a stain-blocking primer; this will not only seal off any leakage spots but will also cover up any unsightly brown water spots on the ceiling surface.
When it comes to ceiling repair, it’s essential that you work with an experienced professional who understands all of the complexities involved. Hiring a water damage mitigation and restoration expert is the ideal way to fix the damage without creating additional issues; these specialists will also detect any further leakage issues caused by leaks in your ceiling and may find any additional leakage-related problems that have emerged as a result of it leaking in through cracks in its structure. In larger areas it might also be beneficial to hire a contractor specifically dedicated to ceiling repairs and repaints
Repair the Damaged Area
As soon as you detect water damage to a ceiling, it is imperative that it is addressed quickly. The longer dampness lingers in a damp space, the greater will be the damage and costlier will be the repairs. Furthermore, your ceiling could become an incubator for mold growth that causes health issues for yourself and your family such as rashes, headaches, dizziness nausea attacks asthmatic flare-ups.
As soon as the source of leakage has been located and rectified, ceiling repairs can begin. If you’re handy, this might be possible yourself; otherwise, professional water damage mitigation and restoration specialists should handle repairs for more severe or widespread leaks.
First step to repairing any damaged area is cutting away loose or hanging drywall with a utility knife. Doing so reveals any sagging joists which should either be repaired or replaced with new joists and drywall, before hanging the new sheeting over the repair area with glue. If painting over it all later on is planned it’s best to prime first as otherwise the new drywall absorbs paint unevenly leaving patches of coverage across it all.
If the ceiling has been stained by leakage, joint compound (commonly referred to as drywall mud) or Spackle can help repair it. Be sure to use high-quality products. A primer with stain blocker may also help seal stains on ceilings while helping prevent future water stains from appearing on their ceilings.
Water damage can have a devastating impact on the integrity of older buildings, particularly due to heavy rainfalls, pipe bursts and other sources. Leaky ceilings or leaky pipes could leave your ceiling leaky or sagging; so acting fast is key when hiring a water damage restoration service provider with excellent reviews online and an outstanding track record for quality service delivery. Taking swift action ensures your home will return to its original state without experiencing further issues as a result of water damage restoration.
If you have a water damage ceiling in the Ohio area contact our water damage experts at Shambaugh Cleaning & Restoration for help.


